The Petzval Lens

I am by no means an expert on the camera lens, and in many cases, the use of a view camera lens versus a modern lens used on a conventual fixed focal plane camera such as an SLR style camera, one needs to take in a few different aspects, such as the area covered on the focal plane as well as the focal length between the center of the lens to the focal plane. then before the invention of the iris type aperture, the lens was generally used as we now call it wide open, that is until it was realized that you could increase the depth of field by decreasing the size of the opening, through which the light traveled, this was accomplished through an action called stopping it down. however, this also increased how long it takes the light to travel through the lens, effectively increasing the exposure time by a stop. The 1st basic stops were nothing more than a washer-like disk that one needed to disassemble the lens to insert, later, slots were added to the lens to allow the user to insert the stops, rather than taking the lens apart. this later style was named after the inventor, a British astronomer John Waterhouse. AKA the Waterhouse Stop.

16599435083_96386c0190_o.jpg

Using a combination of continuous lighting and strobe lighting, along with fresh collodion, I was able to take some, in my opinion, wonderful photos at the Tanners antique and craft show, this last weekend. I also got to show off, some of the neat aspects of using a Petzval formula portrait lens. The lens historically, was a purely mathematically purpose designed lens, to increase the speed of how the light traveled through the lens to allow the photographer to use nearly instantaneous exposures times to take portraits. However, the lens also had some artifacts. Those artifacts were very narrow focal area and shallow depth of field. Forcing the photographer to use large and heavy lenses, for very small sized images, those artifacts also helped expanded upon the argument as to what photography was, such as was it a science, was it art, or was it simply something to record history, creating multiple camps and ideas of what photography is or was, even today 178 years post the introduction of the daguerreotype, photography is still evolving, creating a greater separation between the artist and the technician, while adding digital artist, that digitally create new images based upon photographs


Petzval.png
typical petzval lens


one of my more favored photographers from the 19th century, Julia Margaret Cameron, who was often frowned upon by the greater photographic societies, because she focused on using the tools that she had to manipulate light and focus, to express feelings and emotions, rather than creating a technical replica of the subject.  As part of that, she, in my opinion, exploited one of the more difficult artifacts from the Petzval lens, bringing portrait photography to a new level of art while helping to create the portrait photographer.

cameron18.jpg

The other artifact, from the Petzval lens, that is not something commonly seen in classic portraiture, as it was often considered distracting while marring the technical details of the photo, is what we call today as swirly bokeh. The effect is created by pushing a combination of the focus area and depth of field. It typically shows up at extreme edges of the focus area and near the infinity depth of focus, outside of the depth of field, beyond the focal point. In a studio like setting with a backdrop, the swirly bokeh doesn’t show up. However, this effect was occasionally used to enhance a focal point, or as an artifact, in some photos from the mid 19th century.  most commonly when the photographer needed a very fast exposure, as compared to using a much slower lens such as a single aplanatic or the near pin-hole, wide angle lens.


18051651_10212589323839070_220875234_n.jpg
Alexander Gardner Photograph was taken at the Battle of Antietam of Alan Pinkerton, using a Petzval Lens, for the speed – note the artifact of the Swirly bokeh


That swirly bokeh effect, was considered more as an artifact of the lens, but it was also a signature of how the glass was ground and spaced, causing lens manufacturers to try a number of different experiments using similar element configurations to keep the speed, while eliminating the artifacts, thus making it very difficult if not impossible to recapture those effects using a modern lens. That is until a company called Lomography created what they call a modern Petzval, which is specifically to exploit the swirly bokeh effect, and in my opinion failing to understand the true nature of the lens.

here’s a review of the Lomography Petzval by Richard Wong


lomography-petzval-58-review-22.jpg
extreme swirly bokeh effect created by Lomography Petzval lens, photo taken by Richard Wong


starting, in, I believe the 1860’s lens manufacturers such as Dallmeyer started allowing the photographer to adjust focal area, through the ability to unscrew in the rear element of the Petzval designed lens, effectively increasing or decreasing the air spaced gap between the rear elements of the lens. This effect allows the photographer to soften the focus, by decreasing the focal area, this effectively allows the photographer to focus on a specific point, keeping that point in perfect focus while throwing everything else out of focus.  This effect turning about to be a wonderful effect principally used by portrait photographers such as Julia Margaret Cameron.

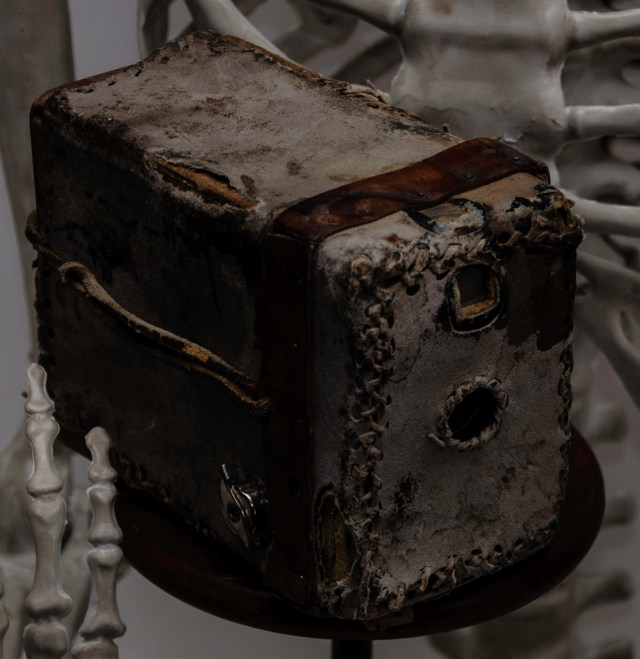
I truly enjoy using my Dallmeyer 2B, Patent Portrait lens, a lens made in 1876,  using the Petzval formula, unfortunately, unless I get a volunteer, I don’t often get a chance to really play and work on doing much more than the generic, almost passport-like photo on a tintype

Dallmeyer 2b.jpg

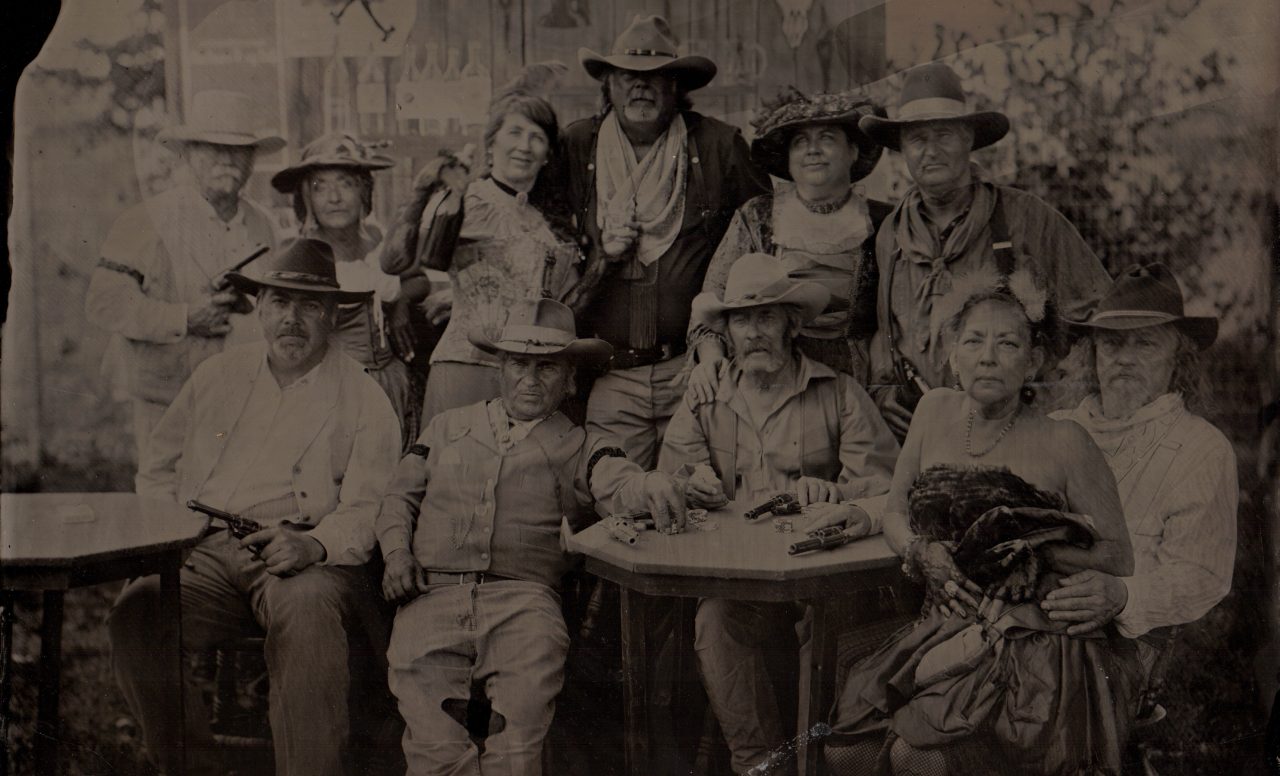
here are the two half-plate sized tintypes of twins taken using my Dallmeyer 2B, – while capture some neat lighting and soft focus effects, creating wonderful portraits.
The images seen here of the tintypes were taken using my cell phone prior to being varnished, and while still wet, as a result, the there are some weird reflections and exaggerations of the actual tones of the image.

please note, due to the particular fixer along with the developer formula I use, my images provide a little warmer brown tone, rather than the cold contemporary blue toned black & white images.  This is compounded by the nature of tintype images, their true beauty is often visually impaired by the ambient light and its tones, remember artificial light, often has more red and brown tones in it, rather than being full spectrum. its then digitally flattened, removing the reflective qualities of the silver and varnish, while picking up color tones from the lighting that the image was rephotographed in using whatever camera was convenient in.  please do not mistake using words such as it’s dark or very brown when comparing to images that have been scanned and digitally manipulated.

note, the video I shared on facebook of the video, of the tintype of my 1909 safety bicycle.  the actual tones are the same.


Advertisement

Mariposa Civil War event.

We are sad to announce that, we chose to bypass the Mariposa Civil War Event due to weather – for us when we attend events such as Mariposa, we travel on Thursday to set up for the School Days presentation on Friday,  then return on Monday. Due to the required time that we are on site, and that we travel heavy, this means towing our trailer and setting up to stay onsite for the duration.  Mariposa is a 7-hour drive for us.

With the rain and snow that was forecast, with zero UV on Saturday, this effectively would have prevented us from taking wet-plate photos for the majority of the weekend.

Wet-plate collodion photography is not as exacting a science as we would like. Also, the chemicals are sensitive to the climate, temperature, and elevation, it also relies heavily on the slower wavelengths of light, primarily Ultra Violet and Blue.  Thus, when those wavelengths of light are filtered out via clouds, it basically prevents us from doing timely photographic exposures, stretching the time of a single exposure to several minutes.

Please note, at present time, Battle Born Historical Photography is on a shoestring budget and often operates at a negative. While Battle Born Historical Photography is technically classified as a for-profit, photographic artist buiness and falls under some different non-profit organizations for education. When we are effectively prevented from doing photographic work, it negates our purpose.

We apologize to the organizers and our friends who had counted on our presence.

P.S. on a personal note, one of the things we missed the most was the birthday celebrations of two of our friends, Becky Thompson & Jack Eaves. 

regards
Kristine & Sharon


Preservation & restoration

While this is not directly related to wet-plate photography, we’ve slowly been working on my 1909 Crown Cyrus safety bicycle, also known at the time as a freedom machine, for women. to an extent, both the camera and the bicycle played a major role in the suffrage movement. Camera’s were now being marketed towards women,  along with the ability to move freely about on the bicycle –

with the small compact carry camera, also came what was called the cycle camera, a style of camera designed specifically to be carried and often mounted to a bicycle. haven’t once been an avid cyclist, I thought it would be neat to mount our Gennert Cycle camera on a period style safety bicycle that, I could use to at wheelmen rides and events, or things like tweed rides, along serving as an occasional prop.

you can read a more about our camera, under wood & brass cameras, here on BBHPhoto’s page.

recently, we were able to acquire some pedals for the bicycle, and have been looking for a period style camera mount for the bicycle, as part of that I took the bicycle outside and took a few different photo’s, and hear they are.

The tri-pod is an early 1900’s Kodak #2 tripod, it’s case is on the ground, along with a period camera case, they were often strapped to different parts of the bicycle or simply worn cross body – thus far with the exception of the basket the bicycle is completely decked out using early 1900’s items, the tires will be ordered later this year.


From film to the print

for those who’ve worked in a photographic darkroom, this is nothing new.

It’s important to understand, that when I state the print type, my goal is to distinguish the type of process that I’m using to create the print. In basic terms, unless I state that it is a digital print, all of my photo’s are done using what is considered a historic or an alternative processes, which done by hand, and often in a darkroom –

daylight developing tank

For this example, I’m using a photo from a roll of film, which I hand developed using conventional D76 developer. This is done using what is commonly called a daylight tank, the tank pictured is for 35mm roll film. To use the style of the tank shown. While in complete darkness, I open the film cartridge, then thread the film onto the spool for the tank, once this is done, the spool is placed in the tank. which is then closed allowing one to keep the film in darkness, but develop in the light.

After the film has been developed, fixed, rinsed and dried, it’s cut up into sections, then typically a proof sheet is made using contact printing frame and an enlarger, in the darkroom.

contact proof sheet

Proof sheets are a great tool, allowing the photographer to selectively choose what images to print as well as providing information, used to print the photo.  using the photo of the cannon firing, you’ll note that it’s the only photo on the roll that shows a cannon being fired.  – to capture the photo, it’s a matter of timing, unlike a DSLR, where the modern photographer will often lay on the shutter, capturing 20 different shots in a fraction of a second.

35mm cannon

Taking a closer look at the photo, I felt this image had a lot of neat aspects while providing me with a lot of room to adjust and change the photo, capturing different feelings and emotions. While these modifications can be done digitally, I feel that the digital modification loses the personal touch, a warmth that says that this image was created by hand.

taking the negative, I printed about half a dozen variations, simply to find and create an impression that I felt striking, I also decided to use fiber based non-glossy paper, with some prefecta-d developer, creating hard blacks, with a lot of contrast allowing the image to become ingrained into fibers of the paper, creating depth, I also cropped the photo as I enlarged changing the framing, this again was done in my darkroom. finally, I used a selenium toner to bring some warmth to the image while also helping prevent the silver from darkening.

The step final was choosing a frame, mat, and mounting the image, again I used the frame and mat to help accentuate the picture, while the glass created another layer of depth.

35mm-virginia-city

This version of the image wasn’t framed, if you note the border was actually too larger fit nicely under the precut mat, so once again back to the darkroom to print a version without the border.

The final version an  11″ x 14″ print, which is presently displayed at the Churchill county offices is for sale

15822867_10211477286838840_3837513586487625474_n

Instagram and Twitter and Facebook Oh my

I was recently advised to follow the proverbial yellow brick road and actively post on Instagram and Twitter and Facebook oh my.

using Instagram more as a sales site, rather than say eBay or even Etsy, both driving direct sales as well as more traffic to my website eliminates the associated fees from eBay or Etsy, and or even gallery fee’s which is often %40 – %50 of the asking price. sadly this then causes the seller to increase their prices. it’s actually very simple math.

For example, this photo, that I took using film, I developed the film, then printed in my darkroom using high-quality fiber based silver gelatin paper, which I then mounted and matted and framed.   for the final image, I’m likely underselling myself, asking only $500.00 for.
cropped-35mm-virginia-city.jpg

however remember this, if I sell the final product in a gallery, I have to mark it up based upon their percentage that they charge, sadly this same basic math applies to sites like eBay.


This print looks very different in person, I use a combo of effects from the paper, developer, toner and yes even the glass from the frame to give the print depth and feeling. it is not a digital photo.

however as part of that suggestion and a question about where to purchase my reproduction frames I’ve created an Etsy store as well as an eBay store.

They are as follows:

Etsy
https://www.etsy.com/shop/BBHPhoto

eBay
https://www.ebay.com/sh/ovw

As to social media, part of the reason I’m writing this blog posting, is the share some info about the main social media sites everyone seems to love and know about. but let us not forget that blogging is also considered social media. And as much as I would prefer to be locked quality away in my darkroom or off in a secluded field taking a photograph, as an artist I have to boast about and show of my work. Creating a strange mix, allowing not just the small handful people who are fortunate to see or own some of my work, but also the contemporary digital natives and immigrants, who prefer socializing through their tablets and phones, rather than in person. The funny thing, we talk about how many digital natives will be sitting, at a restaurant looking at their phones. most engineers and artist tend to be introverts, thinking and working on their own projects, even in physically social settings. the main difference is that using a phone is just more obvious, than thinking or scratching ideas on napkins, and worse yet, those endless post on social media are much more open than say me working in my darkroom.

As to calling me a digital native or immigrant, I don’t really fit either of those. in that in many respects helped create the tools for social media while pioneering on the internet.

Back to using social media, remember the end-user, is the product of social media, that product, those people are also the audience to ads that are customized to the user’s preferences by click-bate and cookies. So, as a small business or artist or for that matter anyone trying to sell anything, how do you get the largest audience without paying for ads. The same way you do with direct marketing, such as Amway, you invite your friends, you tell them about how great your product is, and why they should buy from you verse a local store. Only now, it has to be done within the same playing field, using the current social media. rather than telling you neighbors and co-workers. when using social media as such you are now changing, becoming a producer rather than a blind consumer. the next part why someone should buy from you, that’s easy as an artist your art is unique. it’s not something that can be found in a store.

some of this, I already knew, but as I said before I would rather be working on my own projects rather than selling it, unfortunately, I can not afford a marketing manager, project manager or any of the other managers needed to allow me to simply work on my art, and have people simply hand me money, I do however feel lucky to have help from Sharon, and suggestions as well as offers to help promote my work from Charlie, of the Charlie B Gallery

so please check out Battle Born Historical Photography on the following social media sites:

Instagram
https://www.instagram.com/bbhistoricphoto/

Twitter
https://twitter.com/BBHistoricPhoto

Facebook
https://www.facebook.com/BattleBornHistoricalPhotography

Google+

Tumblr
https://bbhphoto.tumblr.com/


The Assistant Photographer

Oftentimes 19th-century photographers would have assistants, after all, there’s a lot of gear to move around and steps to take to do one photo. Bill the Cat, has at times been one of my assistants, here he helped hold our 4×5 Ansco down while distracting small children at the Reno 2016 Mini Maker Fair.


bill-the-cat
The Bastard assistant. whole plate ambrotype 2016

however, he also likes his beer..This Tintype was taken to be used for blackmail at a future date.

Agfa-Ansco Tri-pod

please note this tripod is available for sale at our Ebay Store 


The Agfa/Ansco name was used on cameras and associated gear such as tripods from 1928 to 1943.

with that, it’s easy to state that cameras, tripods along with any other hardware used with cameras in specific are from the 1930’s

What I’m offering is a large format fully adjustable Agfa/Ansco tripod, that is in reasonable condition for its age. all of its parts in place, however, the spring that holds the crank to raise or lower the head is weak and should be replaced, or re-tensioned.  the platform is also missing a piece of wood, this doesn’t physically affect anything.

This tripod will comfortably support a heavy Agfa/Ansco 8 x 10 Universal, View Camera.

this tripod with its legs fully extended raises up to 52.5″ tall,  with it’s lowest possible height as 29″

The Tripod folds 35′ long and about 9″ diameter.

The platform on the head is 9.5″ x 6.75″ covered with its original felt, that’s in excellent condition.


Museum quality frames

The frames, that I’m producing are cast from molds of original frames out of resin and are as close as practical to the original thermal set plastic frames.  Please do not confuse these frames as cheap imitations. I’m using modern materials to make molds of original 19th-century frames. The original frames are often quite expensive and difficult to obtain. Occasionally I do sell original frames; however, they are sold at a premium based on current market values.

The original frames were handcrafted and designed, a metal mold was then made from that design. The frames were cast from a thermal set resin, that’s often incorrectly called gutta-percha. Gutta-percha is not plastic by the common definition but rather a form of natural latex, most of it, during the 19th century was used to insulate underwater telegraph lines or was mixed with other materials to create a more hard plastic like substance. As far as it’s known Union Cases and frames were not made from or used gutta-percha in their construction. Then, depending on the age of the case or frame, they are made from a mixture of natural resin, sawdust, and celluloid. the older cases and frames have a different look to them, they look like they are made from beaverboard or wood rather than resin. The newer union cases and frames use a resin called Parkesine. Parkesine was introduced in 1862, as the 1st man-made plastic, it is made using our favorite chemical compound, Nitrocellulose aka Collodion, mixed with some different resins to create, a pliable substance that when heated can be molded. Modern resins are considered exothermic when the two parts of the resin are mixed together, there is a chemical reaction that heats the material hardening it. Unfortunately, the word gutta-percha became a common household name for all plastics in the late 19th-century and is still used today in much the same fashion.

The Frames, and eventually cases that I’m making, are molded in silicone and cast using modern resins that, are possibly stronger than the original frames. so please do not think of them as the same cheap plastic injection molded frame. they are all hand made, one at a time using high-quality materials.

please note, that the frames and cases are molded from original frames therefor they are not designed for modern image sizes, such as 4×5, 4×6 5×7 and 8 x 10. historic sizes are referenced by the plate sizes such as whole-plate, half-plate, quarter-plate.. and so on, for those measurement’s please see my prices

There are a number of different styles of frames, as well as materials that they are made from. I’ll do my best to explain the styles as well as provide a basic example.

Wood Frames:
These frames are typically reserved for the larger whole-plate or larger images. They are very often ornate with gold-leaf accents. Many of them are very deep, much like a picture box, they are basically typical wood frames of the era, with many different variations, the images are protected with glass and separated from the glass via a mat, that’s chosen to accent and frame the subject in the photo. and finally, the Frame is backed with wood or paper and wire attached to hang the photo.

painted-whole-plate

This particular frame measures 12” x  14” and is 2” deep. It’s a fine example of a 19th-century wood frame, with a hand painted, whole-plate sized tintype. Circa 1850’s

European frames:
These frames are typically made from wood and are finished with plaster filigrees and coated with a varnish.  They are designed to accept a separate cassette, that’s often an ambrotype that’s been sealed and matted with a plaster & paper mat. like their wood counterparts, the frame & cassette are backed with paper, there is typically a small ring that’s been attached via a small grommet to hand the photo.

european-fram-dated-june-19-1855

This particular frame measures 7.5”  x  8” the visible image area 2.5” x  3” – it’s a tinted ambrotype, on the back of the cassette, it states: Taken at Canterbury, June 19th 1856
aged 69

Papier-mâché:
These frames are sort of rare, in that they typically do not survive the ages, I believe they are cast in a similar fashion as some of the resin frames, only with a few layers of Papier-mâché, which is then painted and varnished.

they were designed primarily to be hung from the wall, via a small ring that’s bonded to the Papier-mâché. The image is permanently mounted and backed with some paper in the frame  – they, I believe will be easy to create modern molds from and cast in resin, or possibly even Papier-mâché, as a less expensive alternative.

20170210-_DSC7316.jpg

resion frames (so-called Gutta-percha): 

at present time, I have a limited number of frames to work with, as originals tend to be quite costly as do the materials to produce them, there are within this group are 3 different sub-categories that I know of which are based more upon how they are mounted in the frame. they can loosely be called: the case-frame, the paper-backed and metal-backed.

  • The case-frame:
    This traditionally is, I believe one of the more difficult styles to produce in that it was traditionally cast from a two-part mold, with picture being mounted into the front of the frame, in the same fashion as a case, traditionally using a piece of glass, that has been set into the preserver, then the mat is placed on the glass, which is then followed by the image, facing the glass. the preserver is then folded in the back. this cassette is then inserted into the front of the case:
  • consistently these have been one of my challenging to make, as I’m not sure of the best location for injecting the resin – additionally, I have to redo the mold as I had some issue with it releasing correctly, at this point my goal is to obtain perfect cast, then  remake the mold from that cast. so far this cast is the best cast I’ve gotten from the mold, I’ve mounted a quarter plate ambrotype of my daughter in the cast. – this frame is not for sale.

16426021_1912102132353027_2874226821122259608_n


  • The Paper-backed
    I do not have examples with the supporting wires, however I believe the frames used a simple wire to allow the frame the ability to stand up, with another ring and grommet fixture to allow the frame to be hung. the backing of this frame is thin cardboard, that’s locked into the frame using the same style of hooks found on a conventional wood and paper case


  • Metal-backed
    These frames are cast from a single piece mold are backed with japanned tin, they have a support which allows them to freely stand, as well as small ring, that allows them to be hung. the back is locked in place with a small piece of tin at the bottom or to either side, it’s attached via a single screw at the top of the frame allowing it swing open, allowing the picture to be mounted.

    I’m presently working reproducing the stand, however, the following photo’s are of one of my cast resin frames with its current back. presently it’s painted tin, with a small ring at the top, attached the same way as the originals. making them very difficult to tell the difference between an original.


Metal:
the majority of these look very similar in design to the Resin frames, only they are often cast in iron or bronze instead. I do not have any examples and have no near future plans on making any.


s-l1600-6
This is an example of a metal frame found on ebay, I believe that it’s early 20th century


The Necrocameracon

necracameracon

We recently acquired a strange camera, it’s warm to the touch, almost as if it’s alive. but at the same time, it feels as if it’s unholy in nature.

we are not exactly sure what it’s covered with or how it works, but it’s said to have belonged to H.P. Lovecraft, and that it was bestowed upon him by  Abdul Alhazred, who crafted this camera using human skin to cover body.

In H.P. Lovecraft’s own personal notes, he indicates that the camera allow the user to photograph the old ones, however, there apparently is a very complex ritual found in the necronomicon involving elemental iron and silver to process the film.


download


The million dollar question


Can you Transfer my photo to a tintype?

It seems that when I’m at non-themed shows, such as generic craft and antique shows Taking tintype photo’s that I’m invariably asked this question.

The basic answer is no, each tintype photo is an original photo taken utilizing historic methods and antique equipment.  However this is not strictly true, in the 19th century people like Mathew Brady, could do what’s called copy photos, using a specialized camera, simply called a copy camera, these still existed today, however they tend to be very expensive, and to be honest I’m not sure how well one would work with a modern color photo.

However, if it’s something that you absolutely need to have, let me provide a basic breakdown of the process involved and the associated cost. While reminding you that many people consider my prices very reasonable, with it often being suggested to raise my prices on some of my different plate sizes.

To start, I can not skip steps in processing a tintype, however, the exposure doesn’t need to be done in a camera, it may be done in a darkroom using a conventional enlarger.

That being said, the photo will need to be turned into a transparent positive no larger than 4” x 5”, basically a slide, I can do this, however scanning your photo is a $30.00 flat fee, with an addition charge of $10.00 for hi resolution print on a transparency. Then, if you want digital restoration work, I charge an extra $30.00’s per hour.

Your basic cost to start is $40.00

The next part is based on the size of the tintype, for this process, it’s based upon my listed base prices, for example, let us say you want a 5×7 sized tintype, I charge $60.00.

Tintype Prices

To expose the tintype, this is done in my darkroom, which is a flat fee of $50.00’s an hour, with a minimum of 1 hour time.

Here’s the cost to you:

$40.00 (scans & prints)
$60.00 (5×7 tintype)
$50.00 (darkroom)
$5.00 (basic shipping & handling)
$0.00 (taxes)
________________
$155.00

So, yes I can effectively do a copy photo of your photo, with the price variances based upon the tintype size, darkroom time & digital touchup work along with extra shipping. The basic estimated price needs to be paid upfront.